My summer course fulfills the UCSB writing requirement for undergraduates, thus I knew my class would be writing intensive. I conceived of the final writing project as following a progression of “staging and scaffolding.”
My final project required students to develop their own definition of religion based solely on the Asian religious traditions we covered in class (it is presented as a challenge to the understanding of “religion” as based on monotheistic Western traditions which emphasize “belief” and “holy books”). This would require students to engage higher levels of thinking with the material (including analysis, evaluation, and creation), far beyond just memorizing foreign terms and names. It also required them to construct a written argument. Both of these goals require staged assignments, and my course was developed with these outcomes in mind.
There were three basic stages building up to the final writing project.
Daily Reflections: In addition to my N-O-O assignments, students had to write and post daily informal reflections on concepts that they could use for the foundation of their definition. The concepts, which I called “threshold concepts,” were introduced through short podcasts, and each student had to locate where these concepts were found in that day’s reading assignment. They were also asked to reflect on where these concepts may have been illustrated in other materials as well, thus creating a network of comparisons. These were informal low-stakes writing tasks which focused more on critical thinking and idea development than formal writing structure. These daily ideas formed the beginnings of an argument for how a religion might be defined. Students also had to opportunity to read the posts of other students, thus increasing the cross-pollination of ideas.
Idea-Generating Writing Project (Mid-term Exam Essay): For the midterm essay I had students take a definition of religion we looked at or created during our first class and either defend it or critique it according the the material we had covered thus far (we had covered “Hinduism,” Jainism, and Buddhism – or the Indian cultural sphere). They had to employ one or more threshold concepts as the basis for their argument. This was envisioned as a conceptional rough draft for their final project which required them to create their own definition. They had to bring in a copy of their paper for peer review and I provided audio commentary on what they turned in. I required this to be a formal academic essay, and gave insight into the construction of the thesis statements, the use of evidence, and organization of ideas. While some of the content would vary, these concerns would carry over into the final project.
Final Writing Project (Final Exam Essay): This essay was the culmination of student efforts to understand and create useful comparisons among the rage of Asian religious traditions we covered. I made the essay due a few days after our in-class final exam so they could spend time referring to class and teacher commentary and to incorporate the East Asian material we had covered since the midterm. To make sure they remained on pace I required them to draft a definition of religion and post it to our course website a little more than a week before the paper was due.
I want to quickly review my use of online quizzes this summer, returning to a post I startedhere. As I noted, I use “low-stakes retrieval practices,” i.e. quizzes, regularly in my courses so students can assess their efforts and make any micro-adjustments to their study habits they deem necessary. Instead of diverting time in class to taking quizzes I decided to have students take quizzes at home online as part of their homework. Here are some quick thoughts.
Practice Syllabus Quiz: Not too many students are familiar with taking quizzes at home, nor was I familiar with the mechanics of making them. I decided to give my students a syllabus quiz after the first day of class, making sure they understood the requirements of the course as well as trying to troubleshoot any issues that may arise when the real quizzes start. As enticement, I offered minimal extra credit for completing the quiz with 100%.
Multiple Choice (MC) Only: Clearly, this will depend on an individual instructor’s educational goals, but I shifted from the norms of my paper quizzes. I would often add a few short answer questions to the end of in-class quizzes, but found that grading these online took a bit too much time. Clicking, loading, scrolling, typing, and saving took far longer than flipping a page. After including short answer questions to my first online quiz I decided to make all subsequent online quizzes just multiple choice so everything could be graded automatically. If this was not a time-condensed summer class I may have kept the short answers, but I looking to save some time overall with online quizzes.
Open-Book/Timed: Honestly, I just don’t trust anyone to not use their notes or book when taking a quiz at home, so I just decided to make them open-book. To offset this a little, I made all the quizzes timed meaning that students would not be able to casually get 100% on every test just by flipping through their notes ormy slides. I told them they need to study before starting the quiz. I gave them just over 1 minute per multiple choice question.
MC Strategy I: Crafting good multiple choice questions can be askill in itself, especially ones that test higher-level thinking (application, analysis, evaluation) as opposed just memory (recognition and recall). The first question below is an example of simple recognition and the correct response (“B”) would (or should) be found word-for-word in students’ notes.The second question combines recognition with application, asking the students to apply their knowledge (in this case, to real world examples). In addition to testing higher-level thinking, the correct answer could not be found word-for-word in students’ notes. Because the main focus of my quizzes is to test simple recognition and recall (midterms and finals are different), I mix in only a handful of MC questions to test higher-level thinking. Yet, it is possible in some cases to transform lower-level cognitive MC questions into higher-level ones.
MC Strategy II: While generally not regarded as a good strategy for crafting MC questions, I’ve found that using some “exception” questions also requires to students to know (recognize) more about a concept.
Testing Recall: Another method I did not employ this summer is to use “fill in the blank” questions that are automatically graded.
Overall, I will continue to develop my use of online quizzes. For me, the benefits of saving valuable class time and automatic grading offset the issues of limiting (or avoiding) short answer questions.
As I wrote about previously, this summer I realized I wanted to use a set of “threshold concepts” as tools to allow my students to compare religious traditions. This posed a specific problem. I needed to inform my students about these concepts in an effective and condensed fashion which still hit upon several important aspects. After eliminating encyclopedia entries and Wikipedia entries, I decided I would write short introductions – I called them “briefs” – to each of the concepts and then audio record them. Funny enough, it was only in conversation with my students that I realized they referred to the briefs as “podcasts.” Ha! (Academic literature tends to refer to projects like these as “complementary podcasts.”)
Originally, my idea was much grander. I wanted to make short videos for each concept. As is customary, I was spending the summer teaching for the Woodenfish program and I wanted to use the backdrop of the Buddhist monastery for my recorded conversations. This quickly was abandoned when teaching duties piled on and I was simply too exhausted to scout filming locations, write scripts, and film the twenty briefings I wanted to cover.
When I returned home and began preparing for my class in earnest I decided to simply do audio recordings and I think this worked out for the best. I certainly fumbled through the first through scripts. I was unsure of the conventions for the genre. I was lucky enough to naturally stumble upon a few guidelines that are recommended for doing education podcasts.
Overview
Time Length: This is perhaps the most crucial aspect. I did not want to impose too much information on my students, I wanted to give them just enough basic facts that they could immediately begin applying the concept to the readings and then develop a better understanding of it through their own investigation. The first threshold concept I scripted and recorded was “material culture,” and it ended up being four minutes and twenty seconds long. I had not set a time limit, this was just naturally how long it took me to write and then say the things I thought needed to be introduced. Overall, my shortest podcast was just less than 3 minutes and my longest was just over 5 minutes. One study (by Cheung On Tam) tabulated this chart for student preferred podcast lengths:
Clearly, going over the 5 minute mark was not problematic, though much of what I’ve read suggests keeping the length to about 10 minutes, if not even shorter at 6-8 minutes. Clearly, script writing ability will determine if listeners pay attention for longer.
Tone: I knew immediately from my extensive use of audio commentary on papers that I wanted the tone to be informal, but still driven by information. In the first few recordings I captured many of my “verbal ticks” (“so now…,” “right”), and even though these were weeded out in later recordings as I became comfortable with the format, I never just plainly read my script. I wanted those verbal cues which suggest conversation.
Conventions: The conventions for my podcast briefs took me a while to figure out, and they are still in flux. Ideally, I like to start off with a leading question, historical anecdote, or even a joke (well, only once – I started my brief on “humor” with a joke). When I’m less inspired, I’ll start off with a definition, especially for terms with clear Greek roots (soteriology, ontology, epistemology). For the basic content I would always try to segment the concept in some fashion, providing “different looks” so students could more effectively see the concept in culturally diverse religions. For example, I described bloodless and blood sacrifices for the concept of sacrifice, and elaborated on the here/now, here/then, there/now, and there/then models of utopia. Sometimes I would just give several broad examples. I would also try to end the podcast with some verbal clue (“in closing,” “I leave on this,” etc.) and restate the most important points or types of questions I would want the students to ask of the readings with the threshold concept in mind.
Transcriptions: Originally I just posted the audio recording to our course website, but then later started posting my script as well. I had already done the work, so there was no additional work.
Technology: I recorded everything on my iPhone, no special equipment. I was honestly surprised how crisp the recordings turned out (no hissing, background noise).
Outcome: After soliciting feedback from my students several said they enjoyed the podcasts. About halfway through the term I switched to uploading just my scripts because a non-native speaker in my class complained about needing to re-listen several times to the recordings. (I would quiz students on the content of the podcast, so note taking was necessary.) I was unsure if this was a widespread problem and students were simply afraid to notify me. After asking about this switch, however, a handful of students noted they would prefer to go back to the audio recordings, which was a peasant surprise. From that point onward I tried to provide both the audio and script.
It was only afterwards that I realized the trove of literature on the effectiveness of podcasts. I am already thinking about ways to incorporate podcasts into my writing course this fall term.
[OCTOBER 2017 UPDATE: Since the class ended I have been thinking about how I used the term “threshold concepts” and decided that it was too broad, i.e. several other terms likely did not meet the criteria for a true threshold concept. I may just use the terms “lenses” in the future.]
Introduction
This summer I decided to try something slightly different for my survey course on Asian religious traditions. I wanted a way to bridge the diverse religious traditions I planned on covering. In other words, I wanted a way for students to more easily and creatively engage in the act – and art – of comparison.
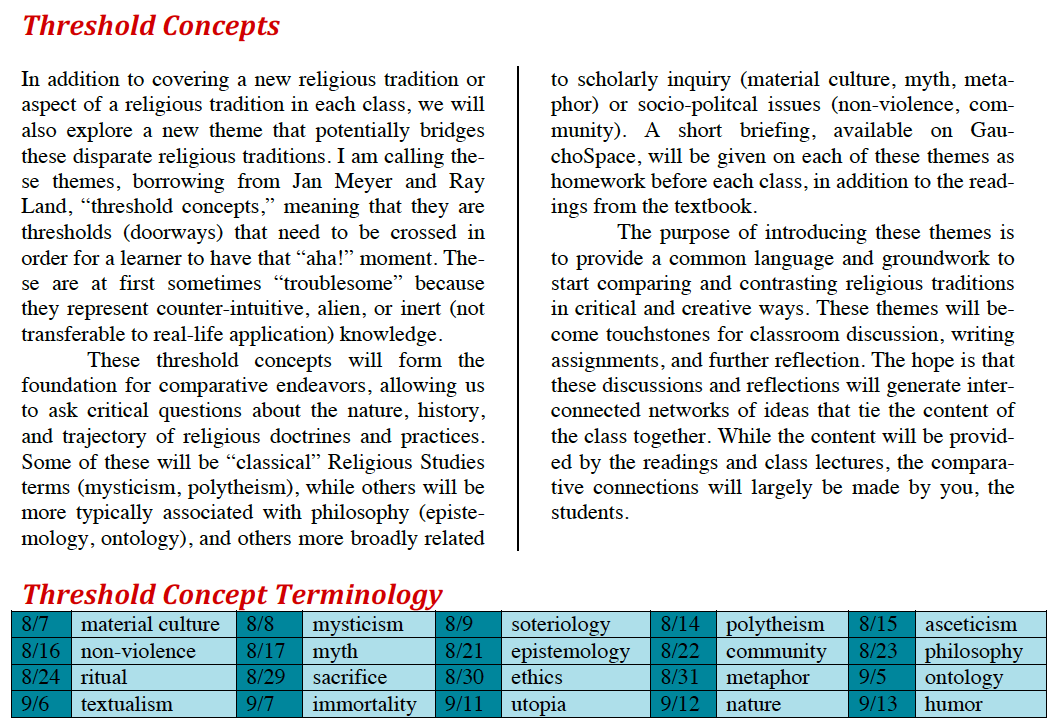
I decided to use a set of “threshold concepts” to function as lenses for comparison. I described “threshold concepts” in my syllabus, along with how I wanted them to be used and which terms I selected. Here is the relevant excerpt from my syllabus:
There were plenty of comparative terms that did not make the cut, including: deity, monism, human nature, millenarianism, sacred/spiritual, and cosmogony/cosmology.
My basic criteria for selection was, admittedly, biased. But generally, the terms needed to serve several functions. First, they needed to be potentially useful for a definition of religion. The main writing projects for my students were oriented around critiquing and creating such a definition. Second, I needed to be able to clearly exemplify the term in the content of that day’s assigned reading and lecture. For example, we discussed material culture on the day we examined the Indus Valley Civilization, which is re-constituted solely through archaeological and art historical remains. Asceticism was discussed in the context of the śramaṇa movements in ancient India, epistemology was introduced to talk about the early Buddhist approach to the Dharma, metaphor was used to understand the explanations of the Dao in the Daode jing, and so forth. Sometimes I selected a term because I thought it could highlight a different way of thinking about religions (see non-violence, immortality, humor).
The immediate problem I encountered was trying to figure out how to introduce these concepts effectively without spending too much time on them. I first thought about simply using Wikipedia entries, but then settled on selecting entries from the widely used Encyclopedia of Religion. The entries here were too long, however, and many times too complex for what I was looking for. Oftentimes the entries placed too much of an emphasis on Western religious traditions, which I didn’t want confusing (or even “tainting”) my students.
Ultimately, I decided I would make short audio recordings, hitting the points I thought were most effective and illustrative of the traditions we were covering. I based many of my ideas on the entries in the Encyclopedia of Religion and provided the pdf’s to my students who wanted further clarification. I didn’t want students to do more (and potentially needless) reading and was hoping to provide them with another mode of learning. These recordings, shunning all modesty, worked perfectly. Students listened to the recordings (which I called “briefs”) and located where the concept was illustrated in that day’s reading. They were then expected to write about their ideas in daily reading posts.
I will do another post on creating the “podcasts” later. Ultimately I found the threshold concepts worked well in helping to organize student thoughts and gave them a solid framework for crafting a definition of “religion.” I recently asked my student to select two potential threshold concepts they would highlight for their definitions, and the tally was as follows:
Soteriology x7
Community x6
Mysticism x5
Material culture x5
Morality x4 (=ethics)
Ritual x3
Epistemology x2
Myth
Ontology
Scripture (=textualism)
Metaphor
Clearly not every “threshold concept” was equally valuable in this assignment (though we had not yet discussed paradise, nature, or humor when the students posted their ideas), but I am quite happy with the variety. I am also happy some students decided to wrestle with tricky terms like epistemology and ontology, or even ideas that often get overlooked in religious studies, such as material culture or metaphor.
If I was to employ threshold concepts again in this manner I may cut some out in future iterations. But, nevertheless, I am quite pleased with how this turned out for this iteration of my survey course.
Jin’e Temple 金峨寺, Ningbo, China, summer 2017. Photo Peter Romaskiewicz.
Introduction
I have never cold-called students in my classes, but I am becoming more intrigued by it. I am hesitant for the reason many others likely share: I would never want to embarrass or alienate a student who is uncomfortable speaking in a group setting. Yet, I run against a persistent problem in my classrooms where only a narrow segment of students consistently share their thoughts. Simply, I am looking for a tool in my pedagogical “tool kit” to combat this problem.
My current summer class has been no exception to this rule. I also noticed this segment of students thinned throughout the term, with only about 4-5 students (out of 25) regularly participating by the end. I was happy to observe that small group work was effective in producing “new” speakers when we convened for class discussion. But I cannot plan group activities for every facet of a lesson, lecturing and asking (open-ended) questions still remains the backbone of my teaching style.
Does Cold-Calling Work?
There has been some compelling research on the value of cold-calling recently. One study (by Dan Levy & Josh Bookin) shows that cold-calling actually helps to increase voluntary student responses. It appears that effective cold-calling “breaks the ice,” so to speak, giving the classroom environment a sense of inclusivity that makes students more willing to volunteer ideas. Another study (by Elise J. Dallimore, Julie H. Hertenstein & Marjorie B. Platt) shows that when cold-calling is used in conjunction with student online postings, students devote an additional hour to assigned readings. A slightly refined technique is suggest by a recent dissertation (by Brittany Carstens) which calls for teachers to gradually switch over from cold-calling to voluntary participation after student engagement increases.
Takeaways
Personally I am not motivated to use cold-calling as a coercive technique to ensure students do their assigned readings (I discussed my primary coercive technique elsewhere). I am interested in getting more engaged students, however. After talking with some colleagues and reading around on the internet, these are my most important takeaways about cold-calling.
Prime the Students: List “public speaking” and/or related skills, as a course goal. Devote a few words to it as well at the beginning of the course.
Start ’em Early: Cold-calling students has to occur on the first day of class and occur regularly thereafter. I really wanted to try cold-calling during this summer class, but decided to ease off on the idea because I was pleased with student participation early on. By the middle of the term I wanted to hear from different student voices, but also did not want to shift the learning environment so significantly halfway through the class and risk really embarrassing a student.
Be Inquisitive: Be motivated by caring to hear what students have to think and say. Too easily cold-calling is conceived as simply testing students to see if they did the work. That’s setting up a rather antagonistic environment. I had one grad seminar when the teacher cold-called a student and caught him a little off guard (he did not regularly cold-call folks). The student asked, in a friendly manner, why he had be chosen. The teacher simply shrugged and said, “well, I usually enjoy your thoughts, so I thought I’d ask.” It was a natural and honest response, and I still remember it.
Model Thinking-Out-Loud: Students may be intimidated to speak without well-formed thoughts. This is one reason why I think my group exercises generated several “new” participants, they were able to rehearse their ideas. Perhaps instructors can speak a little off-the-cuff to invite similar “live thinking” from students.
Inviting Others: Closely related to the above point is inviting students to help others along or to fill in the blanks. Instead of moving on from a student who does not have a response, you could have him or her take a wild guess, or just invent something (as students commonly do on exams!). From a different angle, you could also invite students to critique or build upon a response.
All’s Fair: To avoid bias (or always picking on the student who doesn’t pay attention) it may be reasonable to select students (truly) at random. Index cards with names are one clear option. There are several “random picker” and “random name picker” apps for phones.
The Shift: Not all responses need to be cold-called. Cold-calling can be used to generate initial conversation. You can ask for volunteers after a few responses, or even switch completely over to volunteer participation once broad engagement is achieved.
To be honest, even after reading and thinking about this, I am still hesitant. Cold-calling is not a natural part of my personality nor my teaching persona, but I do want to challenge myself and try new things, even if I ultimately decide they are not well suited for me.
This is odd to admit, but I run a “coercive classroom.” And there is nothing more coercive in my mind than having my students write daily reflections on assigned readings. I have little reason to think they (or anyone, really) would keep up with the readings without a regular assessment of some sort. Of course, open class discussion on the day’s readings can “peer pressure” some into regular reading habits. I’ve found, however, only a select few are consistently willing to offers their insights, while others are more content to simply listen. (Cold-calling students is a craft I have not yet mastered, but will be attempting next semester. I plan to write about it here for another post.)
There are several ways to gauge if a student has read, but many require a lot of additional effort of the instructor. One may prepare a series of comprehension questions that are handed out just previous to the assignment. These have the benefit of focusing the student’s attention, but I would argue also have the same drawback (to tell the student what they should find interesting or important). It also takes time to craft thoughtful questions that genuinely move beyond basic fact-finding. I personally tend to save good questions like this for class discussion.
Daily (or surprise) reading quizzes are another means of coercion. I’m not convinced of the value of these either, mainly because the questions have to be “easy,” allowing for the student to signal to the instructor that the reading was done even though it may not have been fully comprehended. And grading these can be surprisingly difficult, especially if the question is too easy.
So I’ve veered in another direction, pulling an idea from my time in the Writing Program. I ask my students to respond to every reading by asking the three same questions.
What is New? What is old? What is odd?
New, Old, Odd, that’s it. I sometimes joking call this my N-O-O assignment. The first covers an idea they find interesting. Something they can be motivated to explore in more depth if need be. The second idea covers finding a topic they’ve seen elsewhere, or at least can create a parallel for. This allow students to build on top of old knowledge. The last concept requires them to critique an author’s point or to ask an clarifying question about a topic.
Currently I have my students post these responses on a Forum in GauchoSpace. After posting they can read other student’s posts, though I have not required them to post comments this time. My practice is to go through them shortly before class, and when I have time, to post a brief comment. Typically I will respond to their questions, but will also encourage their curiosities. Even if I do not have time to write responses, just browsing the posts will give me ample ideas of where to take my lecture and what to go over in more detail. I have hesitated to call out students by name about their (insightful) comments, but hope to make this a more common part of my practice.
I grade the reflections based on a simple “did it” or “didn’t do it” scale, though I’ve contemplated a three point scale of “outstanding,” satisfactory,” and “unsatisfactory” (plus “did’t do it”). I typically give my students a few “days off” as well.
Below are the directions I’ve used this summer (I tweak them for each class I teach).
Directions When approaching the reading assignments for this course, I want you to pay attention to three critical aspects: what is New to you, what is Old to you, and what is Odd to you. Your written reflection for each one of these critical aspects should be at least a few sentences in length. Provide page numbers from the readings as necessary.
Below are some of the types of questions you can ask yourself for each aspect.
1. New – What was something new and interesting? What was particularly useful or insightful? What quote or passage was able to reveal something interesting and/or helpful for you? Why was it so? If anything, clearly locating these sections will make the time you spent reading seem worthwhile.
2. Old – What was familiar? What quote or passage claimed something that you already knew? Was there something that seemed familiar or had a potential parallel to another religious tradition you know? Locating these sections will give you a clear foundation should you encounter other sections that are not as clear to you.
3. Odd – What was confusing or unexpected? What quote or passage did not make sense or were you critical of? What problem did you have with it? Locating these sections will help you keep a healthy and critical attitude towards the readings and suggest areas that require further exploration.
Your response will have to be posted before class for you to receive credit.
This summer I’ve tasked my students with writing a final paper that argues for their own definition of “religion” based solely on the Asian traditions we cover in class. As part of this process, I’ve required them to craft a rough draft that was due during our mid-term exam. Technically, this was a slightly different shorter assignment that built towards their final product.
I assigned this shorter assignment with three specific goals in mind. One was to motivate them to think about their project early. The second was to force them, through peer review, to see how their fellow students tackled them same problem and hopefully to inspire their own approach. The last goal was to allow students the opportunity to practice the (slowly acquired) skill of good critique.
While this last objective really has little to do with the content of my course, I feel it is incumbent on me to teach writing in a Humanities course even when I am not formally teaching writing. (Yes, I have been indoctrinated.) Of equal importance, this provides my students insight into my criteria several weeks before they will hand in their final project. Consequently, this requires some type of peer-review rubric. If you haven’t tried it already, open-ended peer-review sessions – where students are just told to write whatever commentary they desire – are not worth anyone’s time.
One can find peer-review handout templates online, but it is important that your peer-review rubric contains elements that are related to your own grading rubric for the assignment. In fact, there is no reason your peer-review rubric and grading rubric cannot be the same thing!
Overview & Prep
Prep work: Each student had to bring in two printed copies of their short paper: one went to the peer-reviewer, the other was handed in for my commentary. I crafted a reader review rubric that each student had to fill out for the paper they read. In making the rubric, I was also drafting my own grading rubric for later in the term. Consequently, this peer-review exercise was also a means for me to gauge how students were interpreting the prompt and where I should re-examine my evaluation parameters.
Overall, I divided the rubric into three sections: 1) basic requirements, 2) organization & structure, 3) overall quality.
Set-up: The students took the midterm the same day we did reader review (summer sessions are rough!), so there was limited time. I wrote basic instructions on the top of the sheet and read them aloud. I regularly remind my students that there are real human beings reading these comments, so be nice; the tone can be colloquial. I also tell them to cite praise as well as criticism as long as it’s constructive (i.e. I want them to consistently tell the author why they made the specific comment).
In this case, I had the students pass their papers to a random person, and then again to a random person until they “lost” their paper. In hindsight I should of had them trade with a partner so they could talk about their papers with each other, but I knew time was going to be tight as it was and didn’t know if time would allow for it.
Practice: We had about 20 minutes total to do this exercise, which was a bit rushed. After a few minutes for instructions, less than 15 minutes were left to do a read through and write comments. I encouraged marginal comments, but also directed students to read the rubric and fill it out as much as they could. With about 2-3 minutes left in class I had the students hand back the papers to the authors so they could look over their comments and ask any final questions.
Outcome: As I mentioned, I wish I had made time to allow the students to talk to one another about their papers after the review session. Some shouted back a few comments to one another as we ended class. The class seemed engaged and invested. My curiosity overcame me and I asked each student to hand in their rubric with their “clean” paper. I wanted to see the type of comments given and gauge how constructive or helpful this exercise might have been. Overall, the rubric appeared to help focus comments on higher-order issues, like argumentation and organization, not just spelling. At least one conversation with a student revealed to me that exposure to another student’s take was key to her understanding the assignment.
A habit I picked up while teaching freshman writing is the use of audio comments for student papers. It was first suggested to me by my writing advisor Doug Bradly who used it extensively in his courses. Over the years I’ve come across a few others who use it, but it is far from commonplace among my religious studies colleagues. Nevertheless, I feel audio commentary offers significant advantages over written comments on several fronts.
Overview
Time: Foremost is the savings on time and the consequent ability to give more feedback. I can certainly speak faster than I can write (or type). This means in the span of 5 or 10 minutes I can offer perhaps three times the amount of feedback than if I were simply writing comments. Students can pause and rewind what I say, and I advise them to take notes as they are going through their papers with “me.”
Tone: Secondly, I think audio commentary is less threatening and more conversational. I can convey a friendly and curious tone far more clearly through my voice than in writing. Sometimes I’m afraid my written comments may be taken as harsh criticisms without conveying the conversational tone I am hoping to find. It adds a personal touch.
Turnaround: Finally, if there is a tight turnaround (as there is often in writing classes), I can email audio comments to my students soon after class and require them to make changes to their papers the next time we meet. (Obviously this is only a benefit if you accept printed papers; digital papers can be read and returned more quickly via email. )
Be Quiet! Of course there are drawbacks. On my end, this means I almost always have to read and grade at home, in a quiet environment so I can record. Sometimes this is difficult, if not impossible, especially if I am traveling.
In Practice
In terms of how I structure my audio comments, I typically begin with a simple hello and dive into my main take-away from the student’s writing. I’ll place the most important overall comments first, giving them a sense of whether or not they assessed the assignment correctly and accomplished the goals I had set out for them. (This is essentially the “final comments” at the end of a paper when writing feedback.) Then I will jump into the paper directly, talking about specific paragraphs and sentences. (These are equivalent to the “marginal comments”.) I’ll number the paragraphs as I read through the papers so the student can consult the same passages. While reading I’ll also make small marginal notes to myself so I can comment; rarely do I write extensive comments directly to students. I generally correct spelling and grammatical mistake in writing and only mention them in my recording if I see a clear pattern emerge.
In practice, I try to limit my audio comments to around 5-7 minutes total. I record them directly on my iPhone and transfer them to my computer and email them out to students. (It is possible to email them directly from the iPhone too, but I like to keep a backup on my computer.)
I’ve been doing this for several years and I always tell my students that if audio commentary is not working for them then they can ask me to shift back to written comments. So far, no one has asked me to make this change.
It is perhaps important to note that I only do detailed audio comments on rough drafts, that is where comments will be the most effective. Since I regularly assign rough drafts, or create smaller writing projects that conceptually lead to larger writing projects (as I’ve done for my summer class), I make sure students receive some initial feedback before diving into their final writing projects.
I have never been tempted to use those PowerPoint templates or slide themes, they were always too tacky to me. I’ve developed my own lecture slide style over the years, and while it has matured over that time, there are still several principles I have come to consider non-negotiable.
Given the universal usage of presentation software (PowerPoint, Keynote, Prezi, etc.) in the classroom, it is quite shocking to me how few internet resources discuss the creation of effective lecture slides. The best I’ve found is Vanderbilt’s Center for Teaching. Many online resources are directed towards perfecting business presentations, and while useful ideas can be gleaned from these I find the rhetorical situation (purpose, audience, topic, etc.) of the boardroom to be different from that of the classroom. It should follow that design conventions would be different as well.
Basic Slide Design
In my earliest days of lecturing (starting around 2005) I designed my slides with just images. I considered the slides (I used, and still regularly use, PowerPoint) to be the same as “old-fashioned” projection slides used in art history classes. I choose images that complemented what I was saying, either in depicting particular people, places, or events, or in providing a visual metaphor that helped give shape to an abstract idea. I wrote a lot on the white/black board back then. I thought that if the students had to write it, I should also take the time to write it.
My slides today have significantly more writing on them, but I still consider images to be the main focal point. Here is a breakdown of how I create lecture slides, focusing on basic design elements. In writing this post I realized that I’ve naturally developed three basic design templates: text-heavy slides, image-heavy slides, and image-text slides.
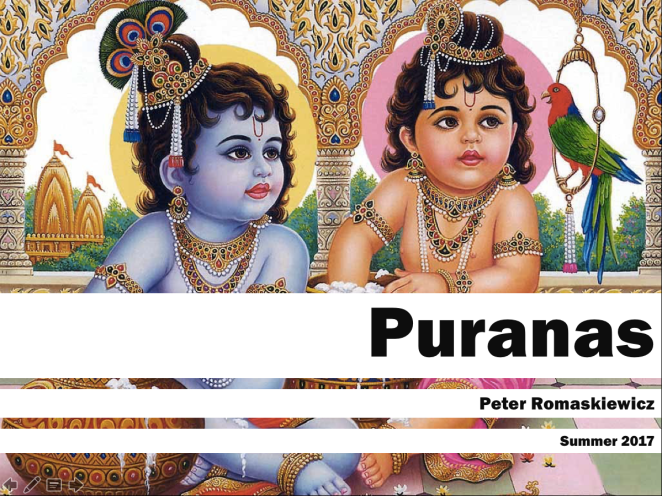
To start, I first choose one aesthetically pleasing, high-resolution image as the “cover image” for the first slide. I incorporate the lecture title and date. (Because of an old job as a book cover designer when I have the time I treat each cover image slide as a design problem, playing around with how I incorporate the title and other information, as if a book cover.)
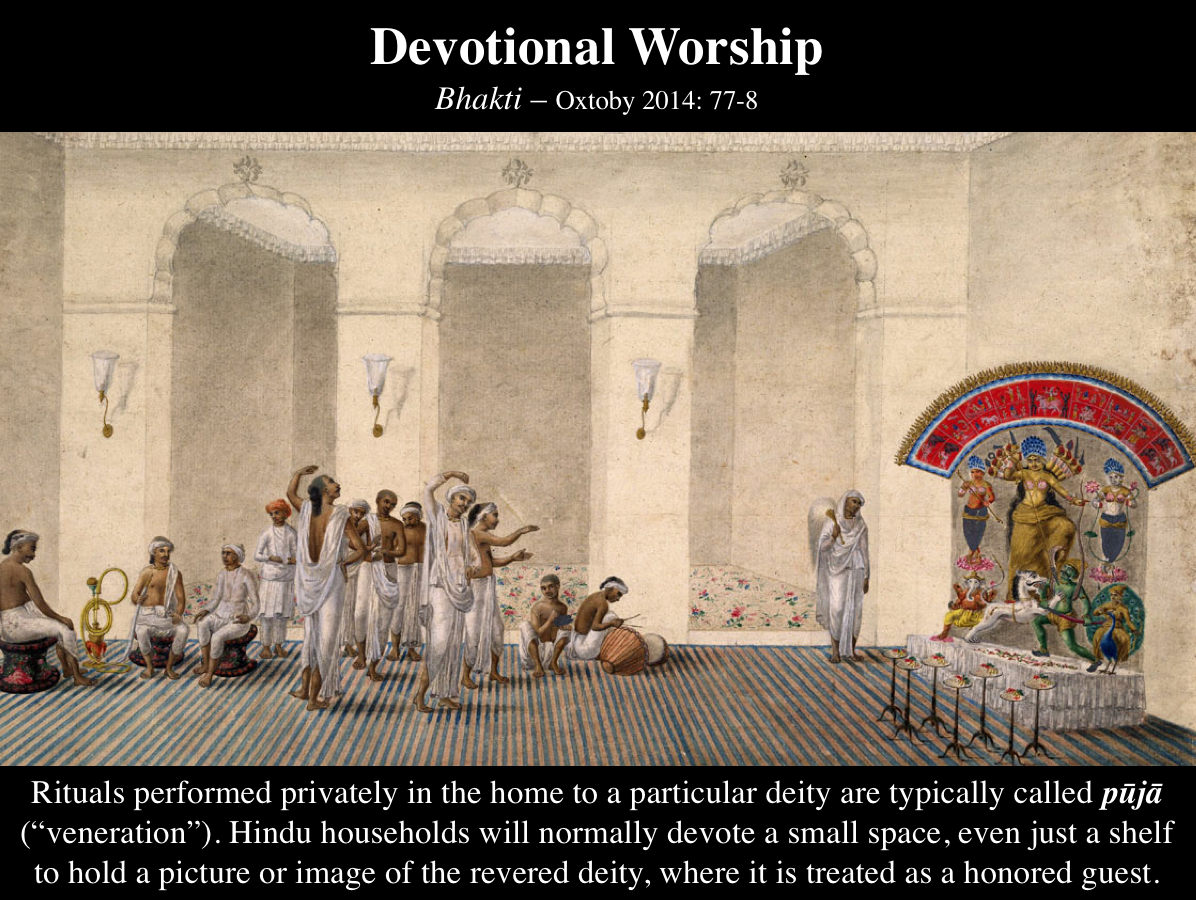
For example, this image depicts a figure (Bālakṛṣṇa) that is central to my topic (Hindu devotional literature). Sometimes it is difficult to locate imagery that matches closely with the topic or to find an image with the necessary resolution. In these cases I will select an image that is more loosely related to the theme (say, an image of the Ganges River). This cover image then serves as my background for my text-heavy slide template.
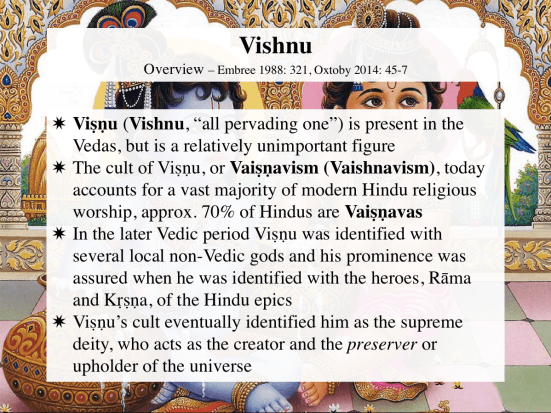
Example: Text-heavy Slide
By using the same image I hope to create a subtle visual clue that unifies the day’s lecture material. Sometimes, if I switch to a significantly different topic during the lecture I will change the background image to also visually suggest the change in theme.
Let me break down the design of this text-heavy slide. I typically type text on top of a partially transparent white box, usually around 30 percent transparency (here, because the background image is so busy, the box is closer to opaque than normal). The title box identifies the theme (here: “Vishnu”) and subtopic (“Overview”). This theme/subtopic layout is the only element that is carried over to (almost) every slide of the lecture. It is important for students to easily identify these components, and thus the theme is the largest font (32 pt) on the slide, while the subtopic is smaller (20 pt).
I’ve become accustomed to including the pages of that day’s readings in this box as well (at 16 pt). I used to regularly add the page numbers to the notes sections on the PowerPoint slides for my personal reference, but I’ve recently began to share these with the students by placing them direclty on the slide itself. It allows direct reference to the readings if necessary and helps the students study.
The main content text is organized by bullet points. I typically use 24 pt. font here for this text. (And yes, I use different types of bullet points to create visual correspondences. For this class, I’m using Dharma Wheels for all the lectures on Buddhism, yinyangs for all the lectures on Daoism, etc.)
I’ve been slowly shifting to using more complete sentences, but I’m aware that this may be problematic – students spend a lot of time writing everything on a slide before they start listening to you speak. I should be clear here – I never advance a text-heavy slide with all of the content showing at the outset. Using the “Animation” function in PowerPoint I fade in each bullet point as I come to it. This eliminates the “text shock” that can come from seeing a slide filled with text and paces when the students write/type.
Example: Text-heavy Slide (quotation)
I also use this slide format to cite longer quotations I want the class to read together. In this case I cite the primary (or secondary) source as the subtopic in the title box.
Example: Image-heavy Slide
I take a different approach to designing image-heavy slides. In these cases I typically switch to a black background (to accentuate the image) and white text. I keep the same layout and font sizes for the title box (it is slightly higher on the slide in comparison to the text-heavy slide) and move all of the content text to the bottom of the slide in order to highlight the image. Again, as always, I only use high-resolution images.
Example: Image-heavy Slide
The font size of the text depends on how much information I want to include. In these examples the font is at 20 pt., but I try to keep it at 24 pt. I’ve also begun to incorporate labels or captions noting the origin, age, or current location of the image. I’ll put this in small 10 pt. font somewhere on the edge of the image where it is almost invisible. I’ll return to this at the end, but since I distribute my slides to my students this information is really only for those who are looking at these images on their computer after class. One reason I’ve started doing this is because I’m developing exercises where students are expected to find their own images depicting religious studies themes.
Design issues regularly arise, sometimes forcing me to tinker with the template slightly, but overall the image-heavy slide remains fairly versatile. For example, I may use the central space to zoom in on a certain part of a larger image and highlight particular elements. In the example below I use the “Animation” function to add in the word balloons as I tell a story.
Example: Image-heavy Slide (variant)
I also often use the “Remove Background” function to highlight the most significant parts of the image. Here I’ve removed the background of the terracotta figurines, bringing them into greater focus and allowing me to place three different examples on a single slide. With fairly uniform design elements I hope to present a sense of coherency for the lecture.
Image-text slides are roughly half image and half text. I use this layout when there is too much text for the image-heavy slide or especially if I want to use bullet points. In practice, I often use this layout when discussing the biography of an important figure, balancing the text with a illustration/photograph (or relevant image) of the person. I also use this template when citing a passage that I want to compliment with an image.
Example: Image-text Slide
These three design templates, text-heavy, image heavy, and image-text, form a majority of my current lecture slide collection. Yet, there are always situations that arise which cause me to design new slides for a particular rhetorical context. Some of my favorite challenges are when I have to think of (and then locate!) visual complements or visual metaphors that help exemplify or elucidate the idea. (I am partly motivated in the endeavor by research done on “picture superiority effect.”) In general, these types of slide tend to be far more interactive, meaning that I use the “Animation” function frequently to reveal colors, text, or new images.
Visual metaphor for karma theory
Visual metaphor for Vedantic non-dualism
Transitions and Animations
In terms of Transitions between slides I almost always use “fade.” Every once and a while, if I think a transition visually reflects a narrative element in my lecture – a discovery (uncover transition), or a debunking (fall over transition) – I will consider incorporating it. Since I use a lot of maps in my lecture slides, I have become quite enamored with the “drape transition” recently which replicates a piece of fabric being unfurled from above, similar to pull-down maps one finds in classrooms.
As I noted above, I use Animations quite frequently in my slides. Every bullet point on my slides are set to fade in when I want to advance to that topic. This avoids text-shock and rapid typing by students. This creates a steady pace for my lecture and controls what I share and when.
There are some advanced Animation settings which I use frequently as well. It is possible to trigger a series of animations right after the transition with only one click of the advance button. This means I can transition to a new slide and then slowly populate it with images and text while I talk without needing to continuously hit the advance button. You can set the animations to start at different time intervals in 1/2 second increments. Much of the time I use these to add just a little flair to the slide, meaning that most of the animation is over within a second.
When I advance to one of my Focus-Quote Slides (I did not cover these above, but they are pretty straightforward design wise), the transition is a simple fade, here revealing the blue background and white title banner. Immediately after the transition is complete the figure on the left (Zhuangzi) flies in (“fly in” animation) from the left side of the screen and the quote flies in from the right after a half second delay. Thus I treat this animation sequence as an extension of the transition which is complete in one second. For this particular slide I have the butterflies slowly float in after a five-second delay, adding a little dynamism to the slide.
Distribution
I make my slides available to my students after lecture. Since I have many slides with long quotations (sometimes not found in the readings), I don’t want students wasting time copying them down. I will print the PowerPoint as a PDF and upload the slides to our class website. I usually add a small “watermark” on the bottom of each slide with my name, date, and email address.
The passing of the Buddha, Dazu Rock Carvings 大足石刻, China, circa 2011. Photo Peter Romaskiewicz.
Introduction
In the waves of interest over “flipped classrooms” I feel that lecturing gets unfairly vilified. I am not the only one tofeelthisway. Sure, dry presentations are not the best way to transfer information and there are plenty of more dynamic strategies to get students actively learning. But I still feel lecturing has some merits and I want to share some thoughts on how I plan lectures – yes, plain no-frills lectures – specifically where I am dominating speaking for over the magical fifteen to twenty-minute threshold.
Perhaps the most critical element to my “plain lectures” is the incorporation of narrative elements, especially conflict (and possibly, resolution). Not that long ago Pixar released a series of free lessons called The Art of Storytelling. The short video introducing the topic of story structure poses this very interesting question: “What do you want the audience to know and when?” This is something I keep in mind when developing lectures because I want to build suspense, or at the very least, slowly lead to a problem that requires a solution.
Lecture Types
I’ve developed two types of lectures along these lines: One I’ll call the BasicStoryLecture and the other I’ll call Critical Modeling Lecture. These are really ideal types; more typically these form smaller components of more dynamic lesson plans that involve discussion, class exercises or group activities, etc. – the token activities of the flipped classroom.
The BasicStoryLecture is simply that, a good basic story. It has characters, a setting, a plot, a climax, and so forth. Religious studies is ripe with good stories and so is the history of religious studies scholarship (think about archaeological and textual discoveries that had revolutionized different sub-fields). For example, I’ve created a lecture to introduce Buddhism through the life story of the Buddha – a natural fit for the Basic Story class – and I will outline how I developed this class below. Shorter lectures I’ve developed that fit naturally into this mold are the life story of Mahāvīra (Jainism), Bodhidharma (Chan/Zen), and Huineng (Chan/Zen).
The Critical ModelingLecture requires me to pit two or more scholars against one another. I introduce a topic, or more specifically, a scholarly question that begs for a solution, and lay out the process by which one scholar attempted to solve it. Often this will be the required reading for the class and invariably this stirs up some discussion or clarifying questions from the students. I introduce conflict by explaining a competing scholarly theory that the students were (likely) not aware of. Its nice when this theory is based on recent discoveries, like archaeological finds or newly discovered texts. I then lay out this new theory. Or, I may give my personal interpretation of the evidence, offering critiques of the conclusions, highlight assumptions, problematizing evidence, etc. In other words I model the critique process. This lecture will usually end with a discussion asking the students which theory they find more convincing.
(An aside: I have integrated the Basic Story Lecture with the Critical Modeling Lecture too. For my Zen class, I’ll tell the story of Huineng, the 6th Chan/Zen Patriarch, and then undercut the traditionally received version of his story by discussing the early 20th century scriptural finds at Dunhuang which dovetails into the new scholarly interpretations based on those finds. I get to tell a great story and then offer an even better – in my opinion – story that undercuts the tradition.)
Slide for “Life of the Buddha” storytelling lecture
Example
To return to the Basic Story model, last week I was able to give my lecture on the life of the Buddha. It’s probably the fifth or sixth time I’ve given the full lecture with this model in mind and I’ve come to really enjoy it.
Prep Work: Students are assigned reading homework that covers the life story of the Buddha and some basic Buddhist doctrine. I always use picture-heavy slides, but this class is exceptional in this regard. I use images depicting life events of the Buddha that are all from the first few centuries of the common era. Thus, all of the main images are rock carvings, almost entirely from northwest India. (The images come from various museums around the world, with many others coming from the Huntington Archive.)
Set-up: I begin the class with a provocative statement; I tell the students that the entire lecture is a fabrication. No scholar believes the existing life story of the Buddha to be historical fact; it was all cobbled together several centuries after the demise of the Buddha. I then ask, if this story is a complete myth, should any of it be important? Why should we care about it?
Ultimately I try to bring class discussion to this point (made nicely by John McRae): It’s not true, and therefore it’s more important. This typically ruffles some feather. Myths tell us about idealized visions of humanity; they reveal assumed cultural and religious values. Thus, the life story of the Buddha reveals important Buddhist values and hints at its central doctrines. I direct the students, as I tell the story, to try to tease out which values Buddhists find most significant and which episodes potentially reflect typical doctrinal viewpoints.
Practice: I then detail the life story of the Buddha using slides to compliment my narrative. Each slide has minimal wording, with mostly names and locations in captions to the images. If I have not been able to find an image depicting an event in the story of the Buddha I do not describe that event. I make it clear that artisans helped to craft the story of the Buddha by depicting only certain life events. (In practice, much of what I’ve read has actually been depicted in art at some time but I will mention a few examples.) This also allow me to break down the images, talking about symbolism, visual narration (synchronic and diachronic modes), and artistic conventions. I try to build the climax around the Buddha’s early ascetic practices and also around his battle with Māra.
Overall the story of the Buddha (starting from an ascetic bowing before Dīpankara Buddha to relic worship at stūpas – taking John Strong’s approach that the biography of the Buddha continued after his death) takes me between 40 minutes to 1 hour, depending on speed and detail. I’ll take questions during the story, but rarely do I allow them to lead to extended discussion. If necessary, I’ll tell student to make notes for later.
I hold off discussion to the end of class when I ask which elements of the story stuck out the most; where were the students the most surprised, shocked, or curious. (I have a slide that shows an outline of 20 different story elements to jog their memory). The Buddha leaving his son and wife often gets mentioned, as does his severe ascetic practices (there are many beautiful, if not haunting, images of this episode), as well as his performance of numerous miracles (while textbooks often overlook these episodes, the art historical record is quite rich).
The final discussion transitions to which values are presented as most significant through this story. Renunciation and the overcoming of desire and the realities of the suffering of life are commonly highlighted themes. For those familiar with basic Buddhist doctrine (or who did the reading), they may point out the connections to the Four Noble Truths or the seal of impermanence.
Outcome: With about twenty minutes of discussion at the end, I can squeeze this class into an 80 minute session. And while bookended by class discussion, the “meat” of this class is straight lecture, or in this case, storytelling.
UPDATE: I stumbled across what I would consider a masterclass in straight lecturing. Michael Puett’s class on ancient Chinese philosophy at Harvard has received rave reviews, but I would say this has as much, or more, to do with his delivery than the actual content. His lecture on Zhuangzi was enthralling to me, and he doesn’t even use slides! I’d say his structuring is almost perfect, he builds and releases tension regularly, bringing the audience back into what he is saying consistently. His intonations complement the content well (note, for example, the contrast he intones between the “quiet” Dao of Laozi and the “ever transforming” Dao of Zhuangzi, starting at the 8 minute mark). He speaks for 40 minutes continuously, and I’d say holds that audiences attention well throughout. Again, he uses no slides, asks no questions, just talks. I’ll perhaps do a breakdown of this lecture for a later post. For me, he has mastered the question asked above: “What do you want the audience to know and when?”
UPDATE II: I ran across this article which specifically talks about lecturing in the humanities.